Tutorials really do take some extra time to put together... They require so much time and work... So I hope that you will grab a cup of coffee and a snack and join me here today... As I said in my previous post, the Sparkle N Sprinkle DT members are creating projects this month incorporating "fun folds." I want to share with you my favorite fold card and a tutorial to show you how to create this fabulous jaw dropper in your home... All glitters, embossing powders and adhesives can be purchased at
Sparkle N Sprinkle, as well as the 2X2 acrylic blocks that I am using in this tutorial. You don't have to use the 2X2 size and they have plenty others to choose from... So I hope you have your drink and snack in hand.... Here we go... Start with a sheet of cardstock measuring 4" X 12" and score lengthwise at 4" and 8"
Then on your center panel find your center point with intersecting lines and draw with a light pencil mark.
Place your 2 X 2 sized square die cut side facing you on your center lines as shown and tape in place with removable adhesive.
Fold both left and right sides over your die and run through you die cut machine. This will cut out both left and right panels at the same time exactly where you need them.
When you have finished running through your die cut machine, reopen both flaps and carefully remove die and erase pencils markings as shown.
As you see in the next photo close up, you die will leave an indentation in your cardstock... Don't worry as you will be covering this in a later step and will aid in placement of your block.
Now it is time to start preparing our acrylic block to emboss. This step is very important. Remove protective film from 1 side of your acrylic and rub your anti static bag over surface really well. If you don't do this step you will end up with a lot of "flakes" left on your acrylic and you won't get a clear crisp image.
Next carefully stamp your image on your acrylic block without touching your block. You don't want to
leave fingerprints or oil from your fingers.
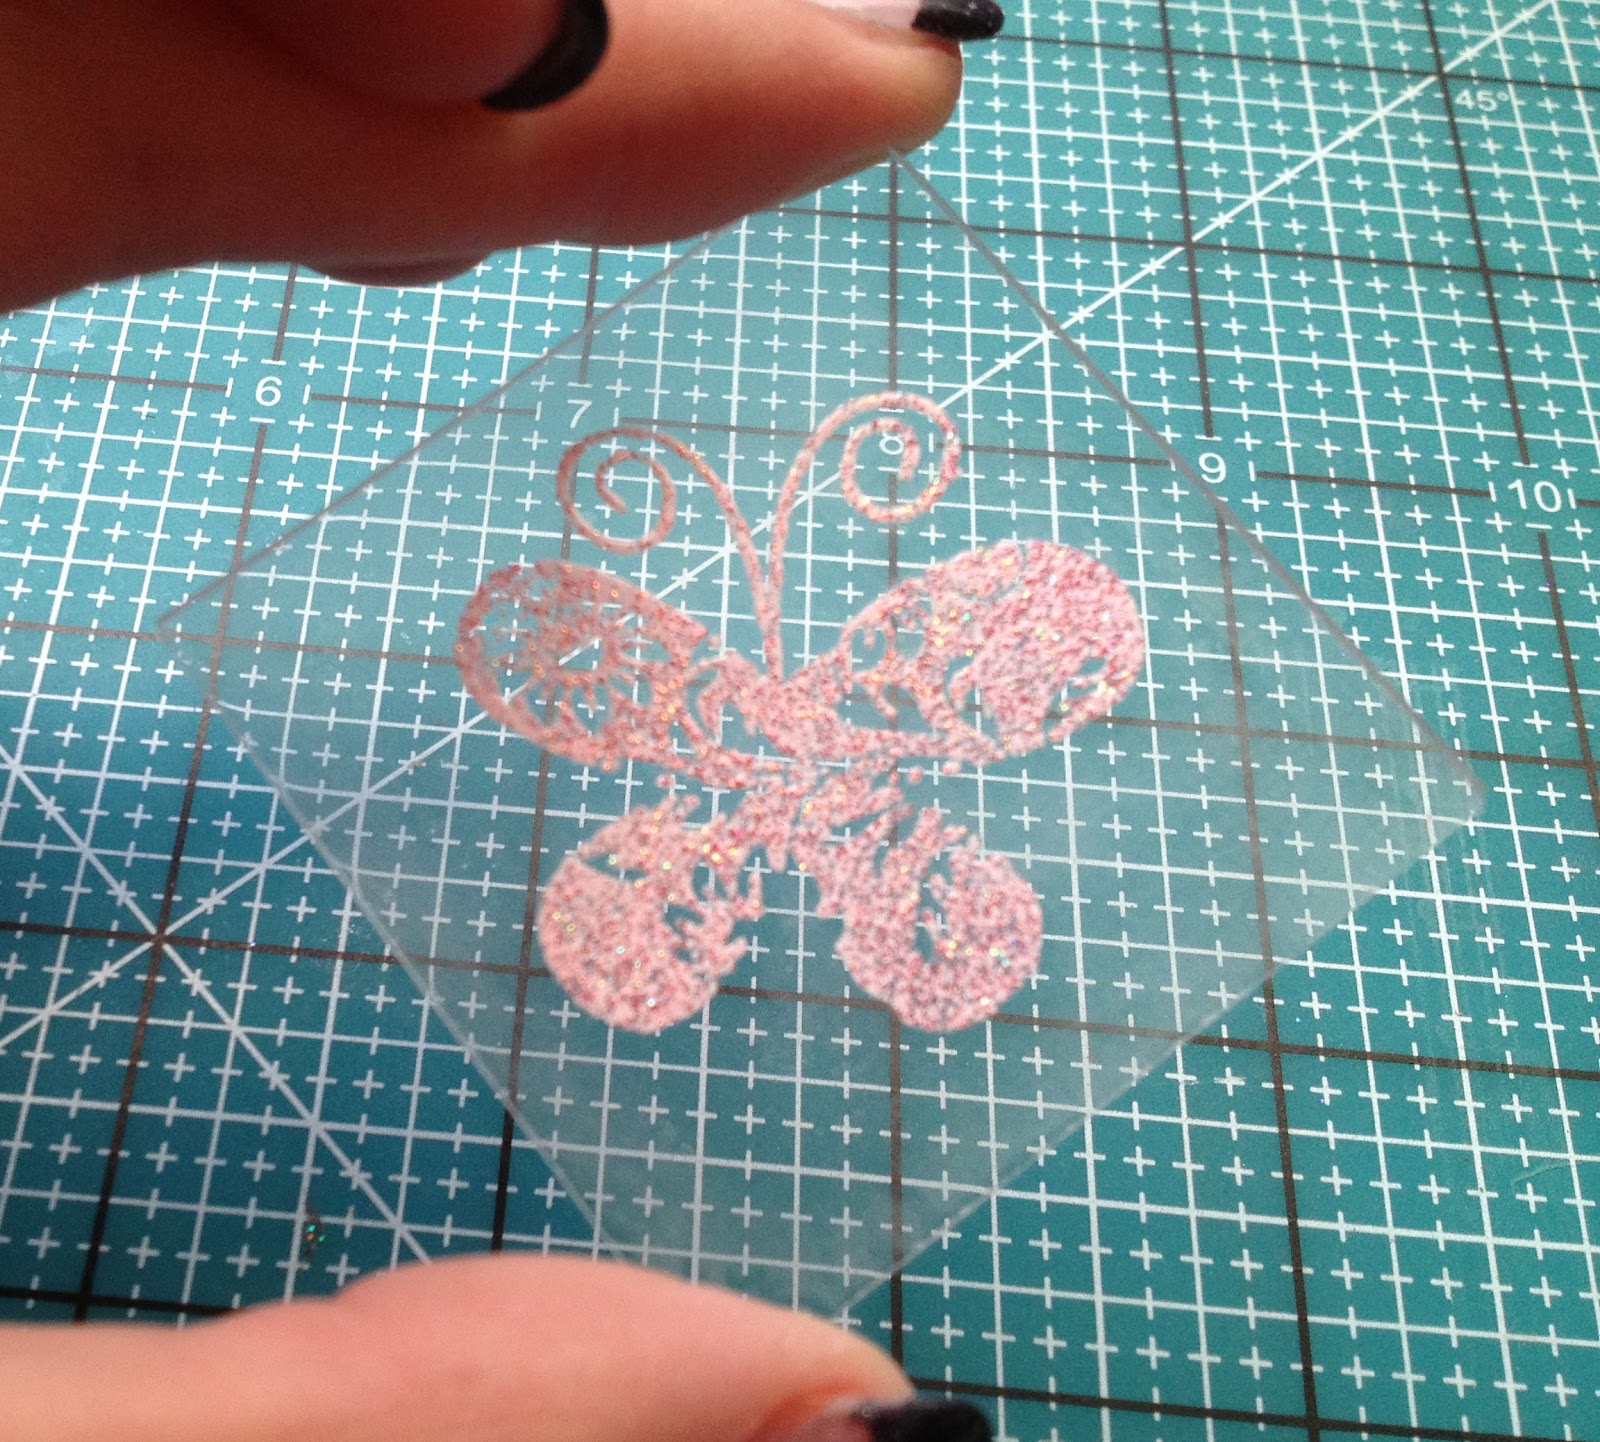
Apply desired embossing powder and heat set. I chose to use Sweetheart EP for my sample shown here.
Remove paper backing from other side of acrylic again being careful not to leave finger prints on the new side and gently press entire block into your versamark pad to coat the backside of your block (NOTE: You want to versamark the OPPOSITE side of your block then you embossed on....)
Using a coffee filter to catch any extra powder, apply stickum powder to your wet versamark and heat set just until melted and quickly sprinkle glitter onto hot wet stickum powder and gently heat set again to "seal" in glitter. (Use can also use sparkle embossing powder which has a glitter look to it as well but I wanted to get the full sparkle on my block.)
This is what your finished block will look like... Nice and sparkly and shiny....
Now using the same die as in the first couple steps above, die cut a white square to place behind your acrylic block.
Now cut out scallop squares the same size as your square block. Cut 2 "window" squares as shown on the left and 1 solid square like shown on the right.
Attach acrylic block to white die cut square using "tear"ific tape (you won't see it I promise) and being very careful not to scratch your glitter off the block when you are removing paper backing from tape and then adhere to solid die cut scallop square as shown below. (Your glittered side should be adhered to the white die cut square.)
Attach to your card base centering and covering the indented portion previously created with your die.
Now when you close both left and right flaps closed again you will be able to see the beautifully created acrylic block now showing through those openings.
Decorate as desired to finish off your card. I have 2 samples shown here for you. The best part is that these acrylic blocks are so thin that you will be able to mail them as you normally would with no added bulk.
These are gorgeous eye catching cards that sparkle with the look of glitter but won't give your recipient the surprise of being covered with glitter when they open their card. This is a fun technique to do and an even more fun card to receive. I hope you will try one of these cards and I would love to see what you come up with... Thank you so much for taking the time to stop by today... I really do appreciate all of the love and support you show... Please let me know what you think as I value your comments and feedback greatly!!!